Series Part 4 Cloud-to-OnPrem Kubernetes Migration
Author: Zohair Diab | DevOps Engineer | K8s Migration Lab
Reading Time: ~6 minutes
Why HAProxy for Kubernetes Ingress?
You’ve built your on-prem Kubernetes cluster with Talos, configured distributed storage with Rook-Ceph, and installed Traefik as your ingress controller. But there’s one problem: your cluster lives on a private network.
How do you expose your services to the internet?
Enter HAProxy — the battle-tested, high-performance load balancer that bridges your public and private networks.
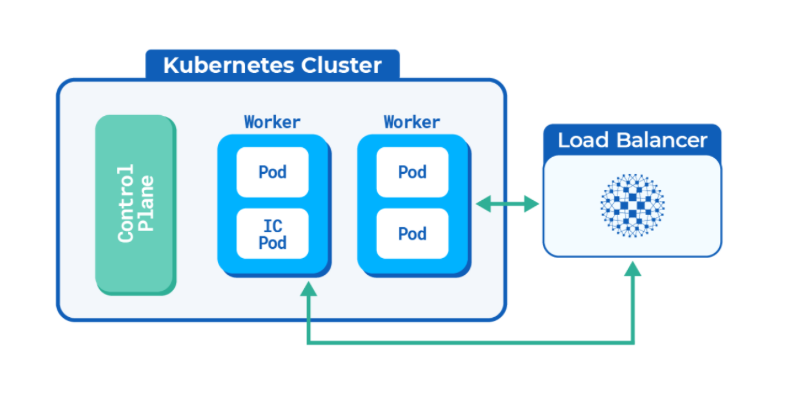
What We’re Building: An HAProxy VM that accepts traffic on a public IP and distributes it across your Kubernetes worker nodes running Traefik. SSL passthrough ensures end-to-end encryption without terminating TLS at the load balancer.
Why HAProxy Over Alternatives?
| Feature | HAProxy Advantage |
|---|---|
| Performance | Handles millions of connections with minimal resource usage |
| Health Checks | Built-in TCP and HTTP health checking for backends |
| SSL Passthrough | Forward encrypted traffic without termination |
| Zero Downtime | Reload configuration without dropping connections |
| Observability | Real-time statistics and monitoring dashboard |
Network Architecture
Before diving into configuration, let’s understand the network topology:
| Network | VLAN | Subnet | Purpose |
|---|---|---|---|
| Public Network | 50 | 194.36.139.0/27 |
Internet-facing traffic |
| Private Network | 62 | 10.11.0.0/24 |
Kubernetes workers |
Traffic Flow
HAProxy sits between the internet and your Kubernetes cluster, accepting connections on the public IP and forwarding them to Traefik running on your worker nodes via NodePort services.
Prerequisites
- A VM in Proxmox with two network interfaces (one for each VLAN)
- Arch Linux installed (or adapt commands for your preferred distro)
- Kubernetes cluster with Traefik deployed
- Public IP address allocated to the HAProxy VM
Step 1: Install Required Packages
Start by updating the system and installing HAProxy with NetworkManager:
# Update system
pacman -Syu --noconfirm

# Install NetworkManager and HAProxy
pacman -Sy --noconfirm networkmanager haproxy

# Enable and start NetworkManager
systemctl enable NetworkManager && systemctl start NetworkManager
Step 2: Configure Network Interfaces
Identify Your Interfaces
# List all network interfaces
ip link show

# Expected output:
# 1: lo: ...
# 2: eth0: ...  (or ens18) - VLAN 62 (Private)
# 3: ens19: ... (or eth1) - VLAN 50 (Public)
Configure Private Network (eth0 – VLAN 62)
This interface connects to your Kubernetes workers:
# Create connection for private network
nmcli con add type ethernet ifname eth0 con-name "eth0-static"
nmcli con mod "eth0-static" ipv4.addresses 10.11.0.100/24
nmcli con mod "eth0-static" ipv4.gateway 10.11.0.1
nmcli con mod "eth0-static" ipv4.dns "8.8.8.8 8.8.4.4"
nmcli con mod "eth0-static" ipv4.method manual
nmcli con up "eth0-static"
Configure Public Network (ens19 – VLAN 50)
This interface faces the internet:
# Create connection for public network
nmcli con add type ethernet ifname ens19 con-name "public-net"
nmcli con mod "public-net" ipv4.addresses 194.36.139.218/27
nmcli con mod "public-net" ipv4.gateway 194.36.139.193
nmcli con mod "public-net" ipv4.dns "8.8.8.8 1.1.1.1"
nmcli con mod "public-net" ipv4.method manual
nmcli con up "public-net"
Verify Network Configuration
# Show active connections
nmcli connection show --active

# Display IP addresses
ip addr show

# Test connectivity to K8s workers
ping -c 3 10.11.0.11
ping -c 3 10.11.0.12
ping -c 3 10.11.0.13

# Test public network
ping -c 3 8.8.8.8

# Check routing table
ip route show
✅ Expected: eth0 shows 10.11.0.100/24 and ens19 shows 194.36.139.218/27
Step 3: Configure HAProxy
Backup and Create Configuration
# Backup original config
cp /etc/haproxy/haproxy.cfg /etc/haproxy/haproxy.cfg.backup

# Edit configuration
nano /etc/haproxy/haproxy.cfg
HAProxy Configuration File
global
    log /dev/log local0
    maxconn 4096
    setenv HTTP_PORT 31465
    setenv HTTPS_PORT 32200

defaults
    log global
    mode http
    option httplog
    timeout connect 5000ms
    timeout client 50000ms
    timeout server 50000ms

frontend traefik-frontend
    bind 194.36.139.218:80
    bind 194.36.139.218:443
    mode tcp
    option tcplog
    timeout client 30s
    use_backend traefik-backend-https if { dst_port 443 }
    default_backend traefik-backend-http

backend traefik-backend-http
    mode tcp
    balance roundrobin
    option tcp-check
    timeout connect 10s
    timeout server 30s
    server worker-1 "10.11.0.11:${HTTP_PORT}" check
    server worker-2 "10.11.0.12:${HTTP_PORT}" check
    server worker-3 "10.11.0.13:${HTTP_PORT}" check

backend traefik-backend-https
    mode tcp
    balance roundrobin
    option tcp-check
    timeout connect 10s
    timeout server 30s
    server worker-1 "10.11.0.11:${HTTPS_PORT}" check
    server worker-2 "10.11.0.12:${HTTPS_PORT}" check
    server worker-3 "10.11.0.13:${HTTPS_PORT}" check
Configuration Breakdown
| Section | Purpose |
|---|---|
| global | Process-wide settings: max connections, logging, environment variables for ports |
| defaults | Default timeouts applied to all frontends/backends |
| frontend | Listens on public IP ports 80/443, routes based on destination port |
| backend-http | Round-robin load balancing to workers on HTTP NodePort |
| backend-https | Round-robin load balancing to workers on HTTPS NodePort (SSL passthrough) |
💡 SSL Passthrough: By using mode tcp, HAProxy forwards encrypted traffic directly to Traefik without decrypting it. This means your TLS certificates are managed by Traefik (or cert-manager), not HAProxy.
Step 4: Validate and Start HAProxy
Test Configuration Syntax
haproxy -c -f /etc/haproxy/haproxy.cfg

# Expected output:
# Configuration file is valid
Enable and Start the Service
# Enable HAProxy on boot
systemctl enable haproxy

# Start the service
systemctl start haproxy

# Check status
systemctl status haproxy
Monitor Logs
# Watch logs in real-time
journalctl -u haproxy -f

# View recent logs
journalctl -u haproxy -n 100
Step 5: Configure Kubernetes Traefik
Traefik must be configured as a NodePort service to work with HAProxy.
Patch Traefik Service
kubectl -n traefik patch svc traefik --type='json' -p='[
  {"op":"replace","path":"/spec/ports/0/nodePort","value":30080},
  {"op":"replace","path":"/spec/ports/1/nodePort","value":30443}
]'
Verify Traefik Configuration
# Check Traefik service
kubectl -n traefik get svc traefik

# Expected output:
# NAME      TYPE       CLUSTER-IP     EXTERNAL-IP   PORT(S)
# traefik   NodePort   10.x.x.x       <none>        80:30080/TCP,443:30443/TCP
Step 6: Verification and Testing
Test from HAProxy VM
# Test HTTP endpoints on all workers
curl -v http://10.11.0.11:30080
curl -v http://10.11.0.12:30080
curl -v http://10.11.0.13:30080

# Test HTTPS endpoint
curl -vk https://10.11.0.11:30443
Test from External Network
# Test HTTP (from your laptop/outside network)
curl -v http://194.36.139.218

# Test HTTPS
curl -vk https://194.36.139.218

# Test with your domain (ensure DNS is configured)
curl -v http://yourdomain.com
curl -v https://yourdomain.com
✅ Success! If you get responses from Traefik, your HAProxy load balancer is working correctly.
Optional: Enable Statistics Dashboard
HAProxy includes a built-in stats page for monitoring. Add this to your configuration:
listen stats
    bind 10.11.0.100:8404
    stats enable
    stats uri /stats
    stats refresh 5s
    stats auth admin:yourpassword
Access the dashboard at: http://10.11.0.100:8404/stats
⚠️ Security: Only bind the stats page to your private IP. Never expose it to the public internet.
Troubleshooting
| Issue | Solution |
|---|---|
| Workers showing as DOWN | Test NodePorts directly: curl http://10.11.0.11:30080. Check firewall rules. |
| HAProxy not binding to IP | Verify IP is assigned: ip addr show | grep 194.36.139.218 |
| Port already in use | Check for conflicts: ss -tlnp | grep -E ':(80|443)' |
| Network interface issues | Restart connection: nmcli con down "eth0-static" && nmcli con up "eth0-static" |
| Configuration errors | Validate syntax: haproxy -c -f /etc/haproxy/haproxy.cfg |
Useful Debug Commands
# Check HAProxy can reach workers
ping 10.11.0.11

# View backend server status
echo "show stat" | socat stdio /var/run/haproxy/admin.sock

# Check interface status
nmcli device status

# View connection details
nmcli con show "eth0-static"
Quick Reference
Essential Commands
| Command | Purpose |
|---|---|
systemctl status haproxy |
Check service status |
systemctl reload haproxy |
Reload config without dropping connections |
systemctl restart haproxy |
Full restart |
haproxy -c -f /etc/haproxy/haproxy.cfg |
Validate configuration |
journalctl -u haproxy -f |
Watch logs in real-time |
Network Quick Reference
| Resource | Value |
|---|---|
| HAProxy Private IP | 10.11.0.100/24 |
| HAProxy Public IP | 194.36.139.218/27 |
| K8s Worker IPs | 10.11.0.11, 10.11.0.12, 10.11.0.13 |
| NodePort HTTP | 30080 |
| NodePort HTTPS | 30443 |
Security Recommendations
- Limit SSH Access: Only allow SSH from the private network
- Keep System Updated: Regular
pacman -Syufor security patches - Monitor Logs: Set up log aggregation and alerting
- Enable Firewall: Restrict access to necessary ports only
- Use Strong Passwords: Especially for the stats dashboard
- Regular Backups: Backup HAProxy configuration regularly
# Backup configuration
cp /etc/haproxy/haproxy.cfg /root/haproxy-backup-$(date +%F).cfg
What You’ve Achieved
You now have a production-ready HAProxy load balancer that:
- Bridges public (
194.36.139.218) and private (10.11.0.x) networks - Load balances traffic across 3 Kubernetes worker nodes
- Supports both HTTP (port 80) and HTTPS (port 443)
- Provides SSL passthrough for end-to-end encryption
- Includes health checking for backend servers
- Uses environment variables for easy port management
What’s Next?
Your on-prem Kubernetes cluster is now publicly accessible! Next in the series:
- Part 5: Cilium networking and eBPF-powered security policies
- Part 6: Velero + Kopia backup automation
- Part 7: FinOps analysis — real cost comparison of cloud vs on-prem
References
Questions about HAProxy configuration or running into issues? Drop a comment or DM me on LinkedIn. Happy learning!